
Editing Estimates
Layout
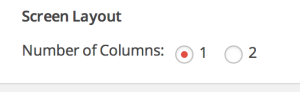
The edit screen defaults to a single column. This can be changed to a multi-column view under “Screen Options” at the top right of the editing page.
Quick Links
"Quick links" are provided to perform specific actions faster. Quick links include:
- Mark Estimate as Pending
- Mark Estimate as Approved
- Mark Estimate as Declined
- Send Notification (link to option on edit page)
- Duplicate current estimate (redirects to newly created estimate)
- Delete estimate
These are found at the top of the edit screen next to the Estimate subject field and descriptions are shown on hover.

Line Items
Each line item has a description, rate, quantity, and discount field. The discount field accepts negative values and could be used as a method to add tax.
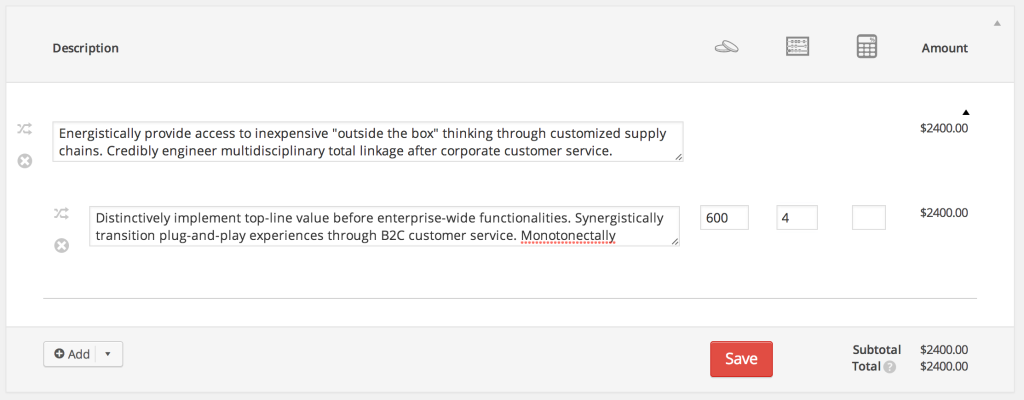
Sub line-items can be created by dragging the shuffle icon under another line-item. The parent item will not have options for rate, quantity, and percentage since those will be calculated totals from all sub-items. This feature allows you to better distinguish line-item costs via sub-items without it being too complex for a client to understand.
Add new line items with the Add button. The add button will have a drop-down option if you have any pre-defined tasks.
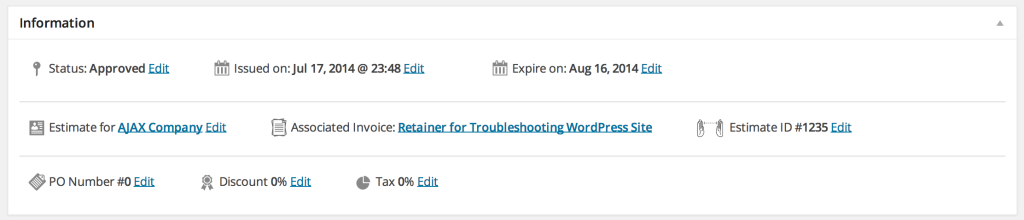
Detail Information
The information box allows you to edit:
- The estimate status
- The date the estimate was issued
- The date the estimate will expire
- The selection or addition of a client
- The selection of an associated invoice
- The estimate ID
- A PO Number
- A total discount (for all line items)
Creating a client
If a client doesn’t exist already, create one by clicking Edit next to “Estimate for None (N/A).” The plus sign to the right will bring up a dialog box for client creation.
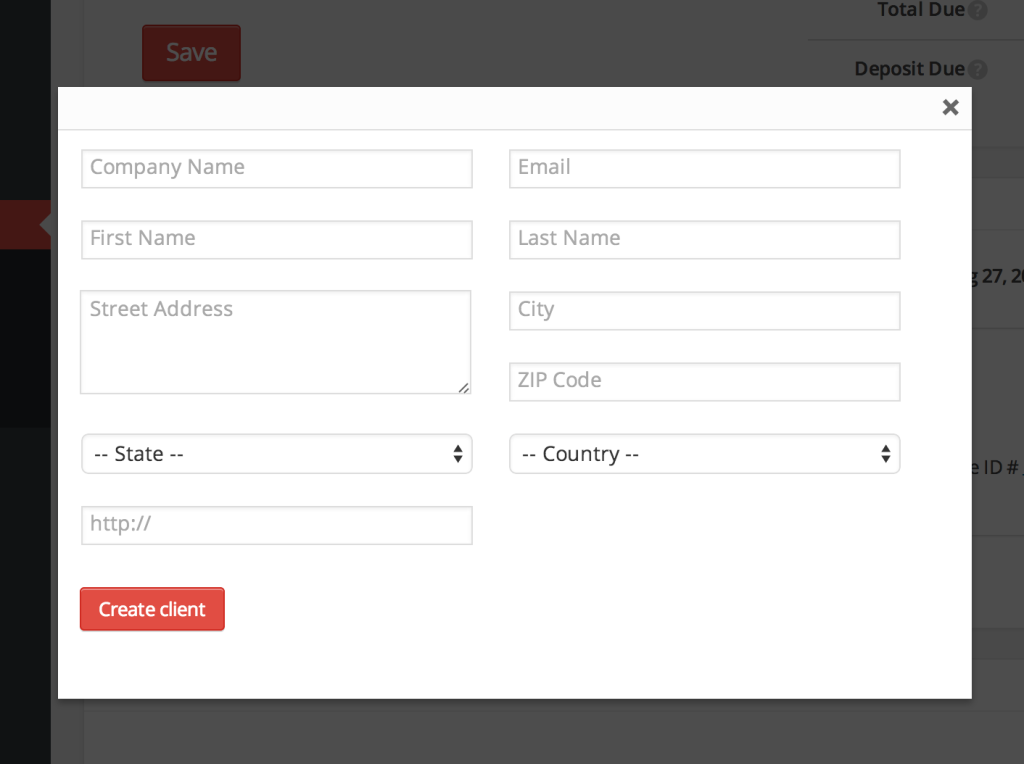
After the required fields are complete and you click save, the client will be automatically created and associated with the estimate. This means that there’s no need to go to another admin page and create the client before adding/editing another estimate.
Terms and Notes
If these fields are left blank than the default terms and notes will be used.
Estimate History
The estimate history shows all the events concerning the current estimate, including status updates, notifications, client views, and more. Additionally, there is a text area at the bottom of the history section for private notes. You can add a project, status, or any other information that you don’t want the client to see.
Sending out the Estimate
Sending an estimate from the edit screen can be done in two different ways: Quick Send or by selecting a Recipient and updating the estimate. The quick send will send the notification in the background, but requires any edits to the estimate to be saved first (unless the information isn’t critical to the estimate notification being sent).
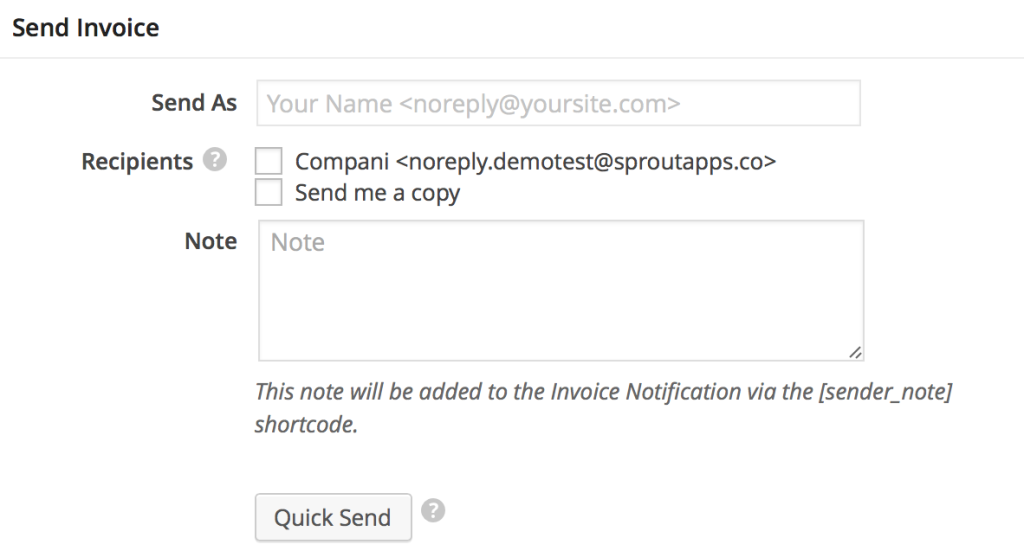
The Note field is used for the [sender_note] shortcode. If you don’t need to add a note, leave this blank and the shortcode will return nothing. There are many ways to use the [sender_note] shortcode. A popular method is to let your client know about any changes you made to the estimate; another method is to add a personal note for the client to increase engagement.
Sending a copy to yourself first is a great way to test out what your client will see on the estimate before you send it out.
Troubleshooting
Having issues? Have a look at our troubleshooting section and/or let us know via support (support@sproutapps.co).